Discussing how my workflows are with other IT folk is always tough. I find I do most things in a unique way. Which is probably why I am always automating. Without it I will do the same thing three different ways and end up with the same outcome. I am definitely not a creature of habit but more of someone who likes to take all of the paths. So when it comes to SCM and VSCode I expect that maybe the same.
Below gives you a general idea of how I use VSCode and Git together for development and day to day workflows.
First. For you Windows guys out there. If you don't use VSCode as an IDE or simply a working terminal for your day to day activities then you should pay close attention. This simply combines a text editor, powershell terminal, ad-hoc putty and a super powerful IDE all in one. Almost everything has a PowerShell module you can pull down quickly from PSGallery and start doing some cool admin tasks.
For the Unix guys out there. I think you might like this too.
Get Git – Install Windows Git
- Download and install git for Windows
- Accept all of the defaults
- Be sure the Credential Manager is set

Install VSCode
- Get your WMF updated to the latest version of 5. I think 5.1 is the latest as of this writing.
- Download and install VSCode
https://code.visualstudio.com/download
- I check all of these boxes

- Complete the install and open VSCode

- I keep a REPO folder in My Documents that houses my scratch repo and all other locally cloned repos.

- That is the PowerShell escape character (the "tick") after SHIFT.
- Hit CTL+SHIFT+` on your keyboard
- This should open a terminal into the REPOS folder
- Clone you Scratch repo from github
Below is reference for how and why I use a scratch repo
- CD into scratch from the terminal
Now you have your working folder with your scratch directory.
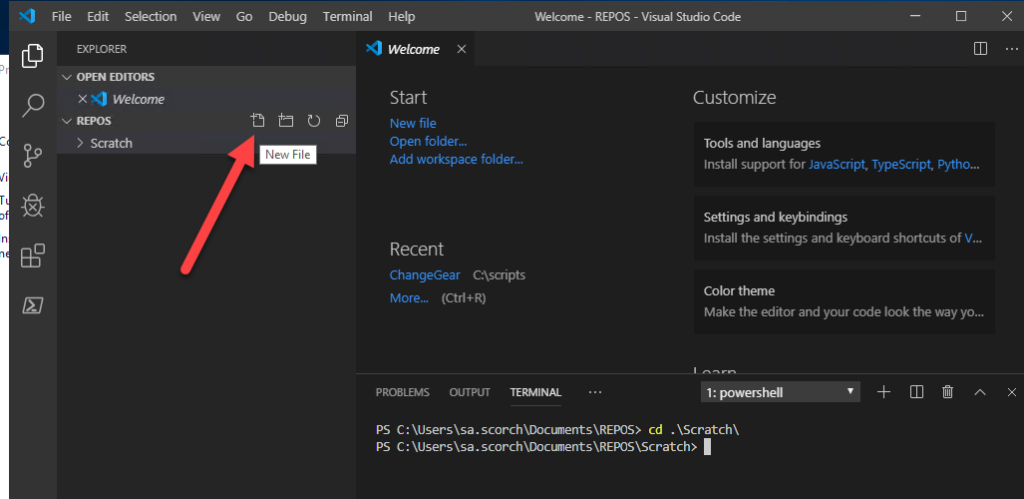
Create new script in scratch
- Crete a new file in scratch


Now you have a new file in the local copy of your scratch repo, the file should be open in the text editor and you are in the terminal in the same working directory.
Notice VSCode already shows that the file is untracked in Git by using the Yellow "U"

- VSCode will run the entire active script in the text editor with F5
- VSCode CTRL+F5 will run the entire script without debug
- F8 will run the selection or where your cursor is
Use the code below for testing
# Paste this in your testfile.ps1 and CTRL+S it
cd ~
gci | ?{$_.mode -like "d*"} | %{ ##Press F5 to run the whole thing
    gci $_  #Put cursor here and run F8
}
cd ~\Documents\REPOS\Scratch
## Watch the output in the terminal
## Assuming you have stuff in your home folder
Start tracking the new file in the GitHub repo
- Run the git add command on the new file

- Commit the file changes since the last commit

- Push your changes to the Scratch repo
Changing existing files in the repo
Changes to existing files are handled the same way.
You will want to make sure that as you change files, your commits are targeted. What I mean by this is that you don't want to get lazy and "git add ." When you have a lot of changes. You should get in the habit of adding and committing as you move along. Queuing up commits until you are ready to push.
Lets say I add some comments to a file. And during this process I have altered another file at some time before committing.
"git status" will unveil the changes I have from the origin.

You see here I have two files that I worked on at different times. What I should do is add the files one at a time and comment the change to each.

This allows the two files changes to be tracked independently inside of GitHub commits.
And I basically do this jumping around between repos and working in the terminals and text editor.
Push when you are ready!

